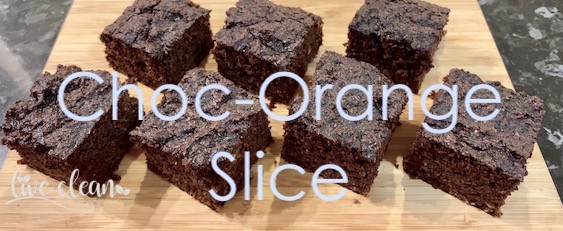
A Choc-Orange Slice recipe

Today I’m sharing another recipe, this time featuring Oranges.

At this time of the year our orange trees are full of fruit and I like to find different ways of using it.

What I like about this recipe is that it uses the whole fruit and nothing is wasted. You get every bit of nutrition out of the fruit.

I have previously written about the health benefits of Oranges, of which there are many.

As is usually the way with many fruits, eating an orange is healthier than just drinking the juice. With this recipe, you eat the peel as well, which actually contains higher amounts of some nutrients than the flesh.

This slice is wheat free and almost dairy free (the eggs) and tastes amazing when served a little warm with cream or yoghurt.

 Choc-Orange Slice

Makes 16 pieces

 Ingredients

2 whole organic oranges (about 400gm weight)

4 large eggs

100 gms desiccated coconut

75 gms almond meal

100 gms rapadura sugar

2 tbsp maple syrup (or rice malt syrup)

3 tbsp cacao

2 tsp bi carb soda (or baking powder)

 Method

  • Wash oranges and put them in a large saucepan, covering them with water. (Put a small plate on top of the oranges to stop them floating.)
  • Bring to boil, and then simmer for approximately 40 minutes till the skins have softened.
  • Take the oranges from the water, cut them into quarters and allow to cool.
  • Remove any pips and place the pieces into a food processor.
  • Process till you have a smooth pulp.
  • Add the eggs and maple syrup processing till just mixed.
  • Add the dry ingredients and process till combined.
  • Pour the mixture into a prepared 20 x 20 cm tin and bake at 180* for approx. 1 hr until firm to the touch.
  • Allow the slice to cool a while before removing it from the tin and cutting into squares.

** Variations **

  • If you have a nut allergy you can swap out the almond meal for more coconut.
  • If you don’t want the chocolate, just leave it out.

A bit about Orange peel

Although orange peels are edible, they are not nearly as sweet or as juicy as the pulp.

It may surprise you that the skins have about four times more health benefits than the actual orange fruit that we eat.

Orange peel actually has more fibre than the fruit inside. The pith of the orange — the white part between the skin and fruit — can be sour or bitter but actually contains just as much vitamin C as the fruit itself.

The orange peel contains flavonoids and other phyto-chemicals that are highly beneficial for our health. Flavonoids are antioxidant compounds that help prevent chronic diseases such as cancer and heart diseases.

Orange peels contain several B vitamins, vitamins A and C. In addition, the peel contains considerable amounts of copper, calcium and magnesium.

(Sources:  www.livescience.com, www.manipalhospitals.com, www.articles.mercola.com)

Also keep in mind, that unless you’re eating peel from an organic orange, it could be covered in chemicals.

I hope you enjoy this slice as much as we do.

Till the next post,

Live clean n Prosper

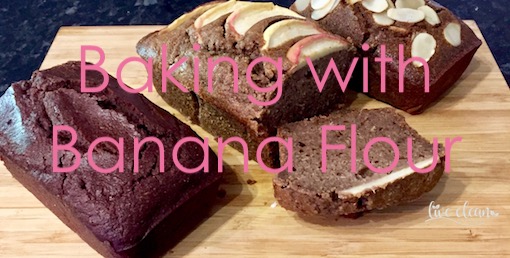
Baking with Banana Flour

Todays post is about baking with banana flour.

After doing the research on banana flour last week, I thought I would find and trial an easy recipe. It appears that you can substitute banana flour directly for wheat flour in your baking. The flour has a texture similar to lighter wheat flours and requires about 25% less volume.

The flour has similar baking characteristics to wheat flour, but is 100% gluten free, which makes it a perfect choice for coeliacs, people with gluten intolerance or those trying to avoid wheat. It’s readily available in the health food section of the supermarket.

Due to the high resistant starch content of the flour, you tend to eat less of whatever you cook with it, as a small amount tends to be filling.

I baked 3 different cakes with the banana flour to determine which recipe to share with you. I chose the chocolate cake one as it has the least ingredients and is usually the most popular.

Banana Flour Chocolate Cake

Ingredients

1 cup Green Banana Flour

2 teaspoons baking powder

3 tablespoons of cacao powder

½ cup maple syrup (or rice malt)

140 grams melted butter (or oil of your choice)

½ cup of milk (type of your choice)

½ cup water

2 eggs

Method
  • Preheat oven to 180’ C and prepare your baking tin (I used a 20cm loaf tin)
  • In a large mixing bowl combine flour, baking powder and cacao
  • Add melted butter, syrup, milk, water and eggs mixing well.
  • Pour batter into tin and bake for 35 to 40 minutes until a skewer inserted into the cake comes out clean (or slightly tacky for a moister cake).
  • Allow to cool completely before removing from tin.

** On my first attempt the cake was a little dry so for the second one I followed this tip I found. Very happy with the result.

Cooking Tip – Cook the cake for ½ of the time uncovered as usual and then cover with foil for the remaining time.

I hope you enjoy your baking experience.

Till the next post,

Live clean n Prosper
Cacao Paste, it’s healthy!

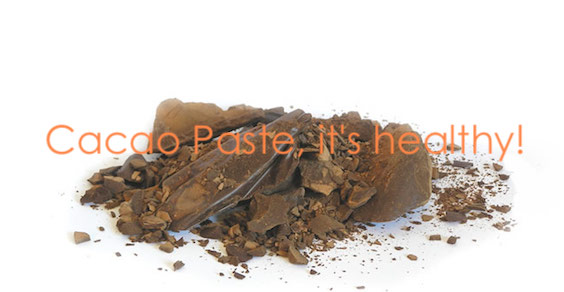
Todays post is about Cacao Paste.

In February last year I wrote about the benefits of Raw Chocolate and posted a recipe.

Yesterday I went to buy more ingredients for making my chocolate and I came across Cacao Paste. I talked to the store owner who informed me that is could be used in a number of ways. It is most popularly used for making chocolate.

So I decided to give it a try, as well as do a bit of research to find out a bit more about it.

 So, what is Cacao paste?

Cacao paste is created when whole cacao beans are fermented, sun dried and roasted at temperatures below 47°C. They are then ground into a paste or liquid, commonly called cacao liquor. This liquid quickly solidifies at room temperature and the result is cacao paste, which is then dried.

Because no heat is used in this process, cacao paste retains its natural properties. Cacao paste is naturally about 55% cacao butter and is an extremely smooth product. Cacao paste is 100% pure organic cacao. No additives, sweeteners or anything else.

 It’s healthy

Not only does cacao paste provide a delicious, chocolatey taste, but it’s also packed with health benefits. It contains more antioxidants than blueberries, black and green teas, and red wine. These antioxidants give cacao the power to lower cholesterol, blood pressure, and risk of stroke.

A single cacao bean contains 54% fat (that’s the cacao butter), 31% carbohydrates (mainly fibre with a tiny amount of sugars), 11% protein (including arginine, glutamine and leucine), 3% polyphenols (flavonols and proanthocyanins) and less than 1% trace minerals including magnesium, iron, copper and phosphorus.

Cacao has been studied for its ability to reduce blood pressure and has been shown to produce “a small but statistically significant effect in lowering blood pressure by 2-3mm Hg in the short term”. It contains phenylethylamine, which controls pleasure and the feelings you get when you are in love. It also acts as a stimulant and can improve mental alertness. Cacao also contains serotonin and dopamine – which also stimulate good moods and ‘pleasure’ feelings.

Cacao also contains great levels of magnesium, which is an essential mineral during times of stress and helps you to feel more relaxed.

 How do you use it?

Cacao paste is recommended for use in several ways. It seems it can be used in any recipe that requires unsweetened chocolate.

Small chunks can be added to dried fruit and nuts to create your own trail mixes, or grate fine shavings over ice cream or sweet desserts. It is also suggested to use it to make a rich, European style ‘hot chocolate’.

I used it to make my Raw chocolate. It was recommended to use the paste instead of ½ of the cacao butter. I did this. The chocolate actually started to set at room temperature. It also gave the chocolate a very rich texture, however, I found that it started to melt a little quicker as I held it.

I think next time I will try making the recipe with 70grams cacao butter and 30 grams of the paste. Check out my recipe page for the recipe.

Enjoy,

Till the next post,

 Live clean n Prosper.